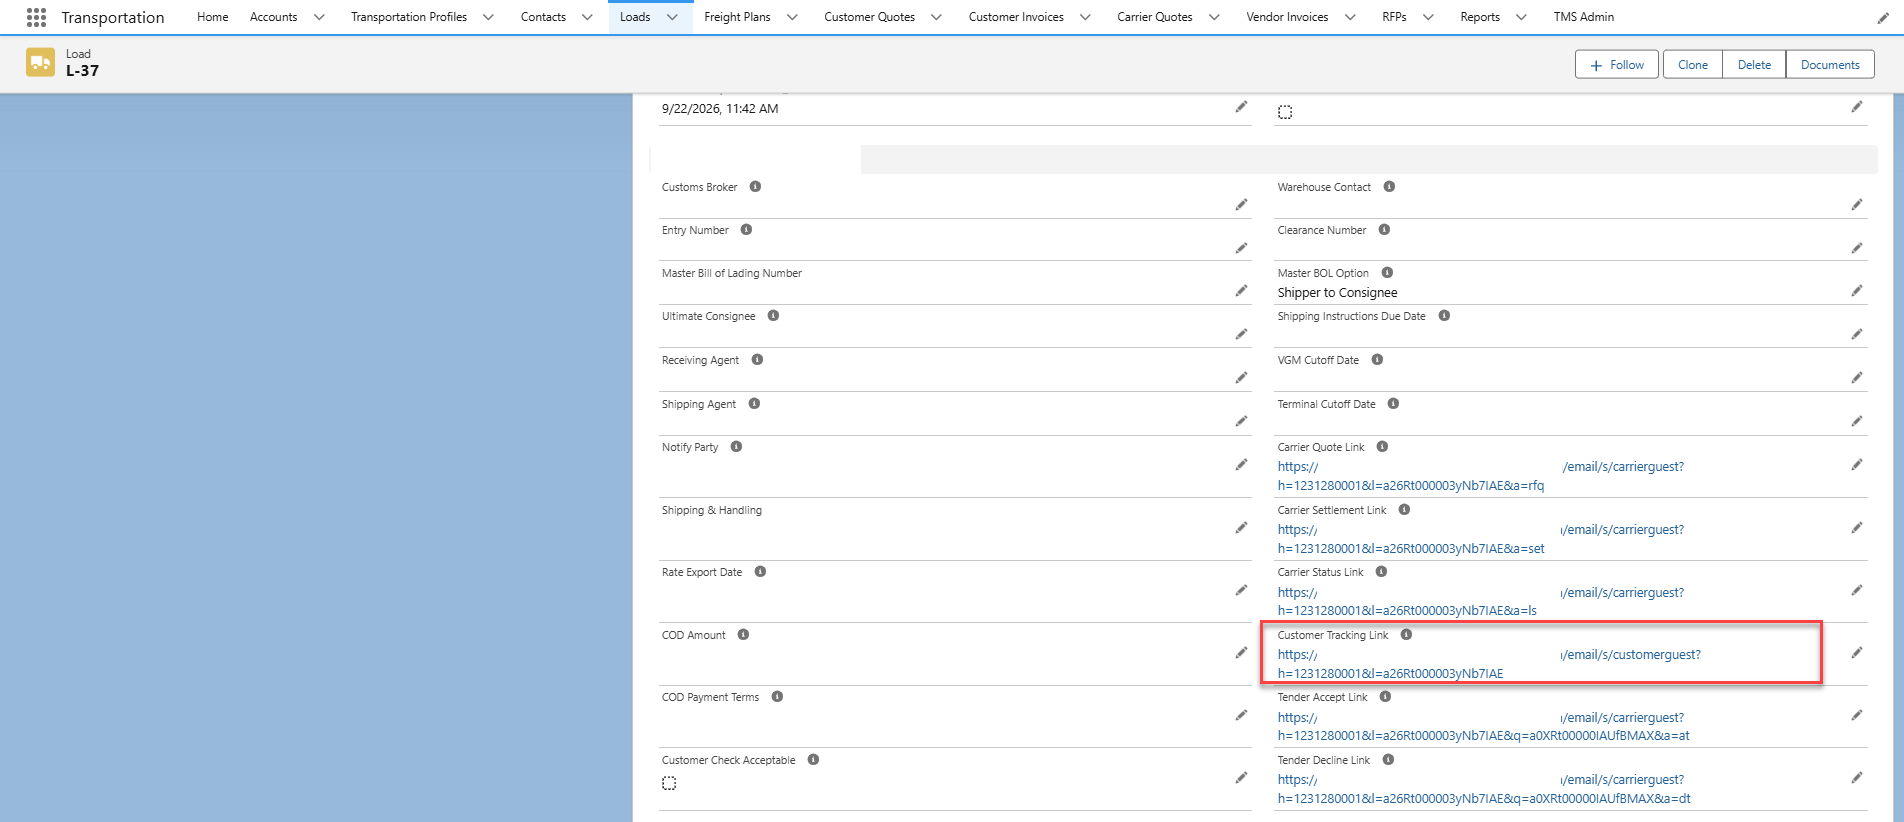
The Customer Guest Shipment Tracking feature generates a unique URL for each Load record. The URL can be sent to customers for Load tracking, providing greater visibility throughout the Load lifecycle.
Setup Customer Guest Tracking Page
Configure the Customer Guest Tracking Page by creating a custom field set on the Load object and enabling Load tracking in the Digital Experiences Site.
Custom Load Field Set
Create a custom Load Field Set to display additional information/fields for the Customer Guest user.
From the Load object, select the Field Sets label on the left of the page.
Click New.
Enter the Field Set Label, like “Customer Tracking App.”
Enter a description in the Where is this used? field, such as “Displays additional fields on the Customer Guest Tracking Page/App.”
Drag and drop the desired fields onto In the Field Set section.
Click Save.
Copy the Field Set API Name and paste in the Load Field Set field in the following Customer Guest LWC component.
Customer Guest LWC Component
The Customer Guest LWC allows customers to be involved in the Load lifecycle. Setup the Customer Guest LWC to enable customers to access Load tracking data.
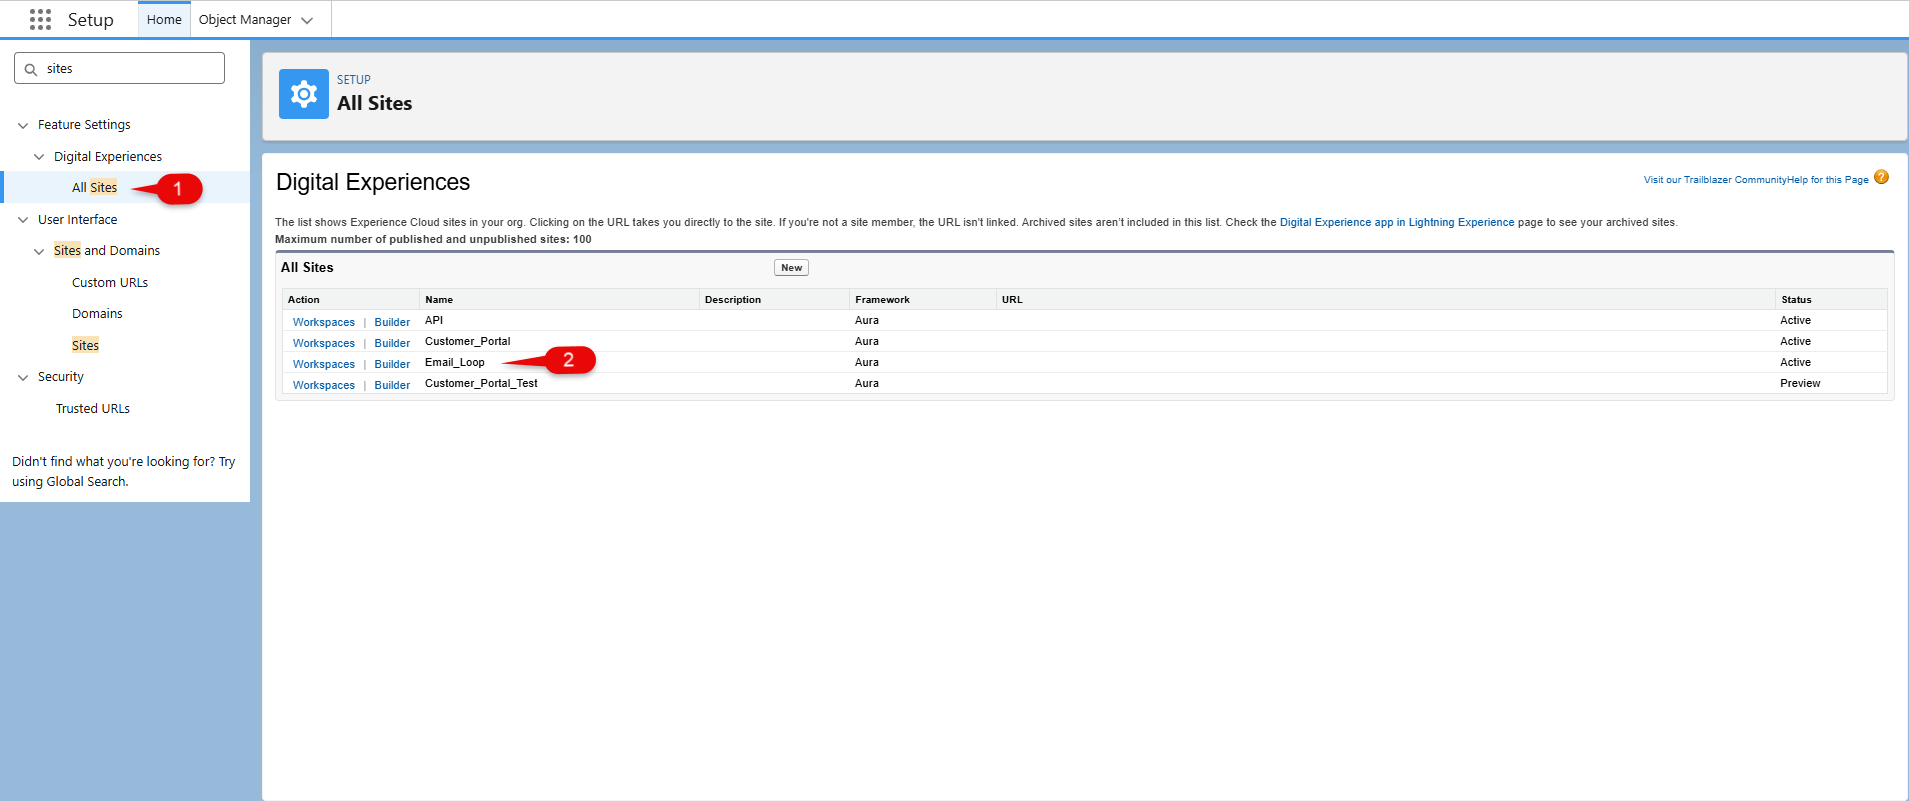
Navigate to Setup → Sites and click All Sites.
Click the Builder link to the left of the Email_Loop site name.
When the Experience Builder opens, from the Menu on the top left side, select the customerguest page.
Warning: When creating the Digital Experiences pages within the Email Loop site for Customer Guest users, it is not mandatory to use the same naming conventions. The customerguest page within the Experience Builder can be named to align closer with specific business needs. However, the LWCs cannot be renamed.
For more information on creating Digital Experiences pages in the Email Loop Builder, see the Email Loop Setup article.
Find the Customer Guest component and check the Allow Search box.
Enter the Field Set API Name in the Load Field Set Name field.
Click Publish once changes are complete.
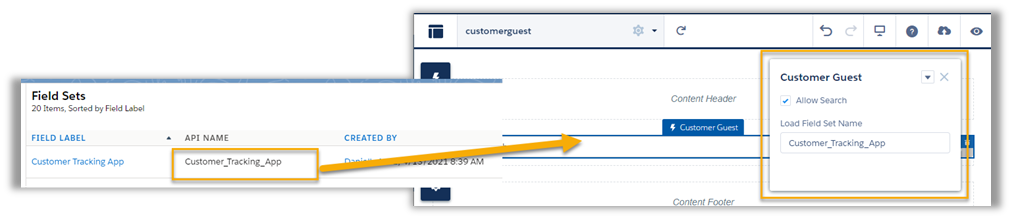
If checked in the Customer Guest LWC Builder, Allow Search displays a Load tracking search bar to the Customer Guest user to search for other Loads anonymously.
Additionally, a custom email template and workflow must be created for guest users to use the Customer Guest LWC.
Add a custom formula field on the Customer Quote object that references the rtms__Load__r.rtms__Customer_Tracking_Link__c field. The custom email template uses this formula field on the Customer Quote object to provide a link to the Load for tracking purposes.
Note: The Customer Shipment Tracking LWC is supported for email integration support. Complete the setup steps to use the Customer Shipment Tracking component in supported email inboxes.
Add the Show Carrier on Shipment Tracking field (Mode) to the page layout, so the appropriate modes show the Carrier logo (or name if no logo) in the LWC.
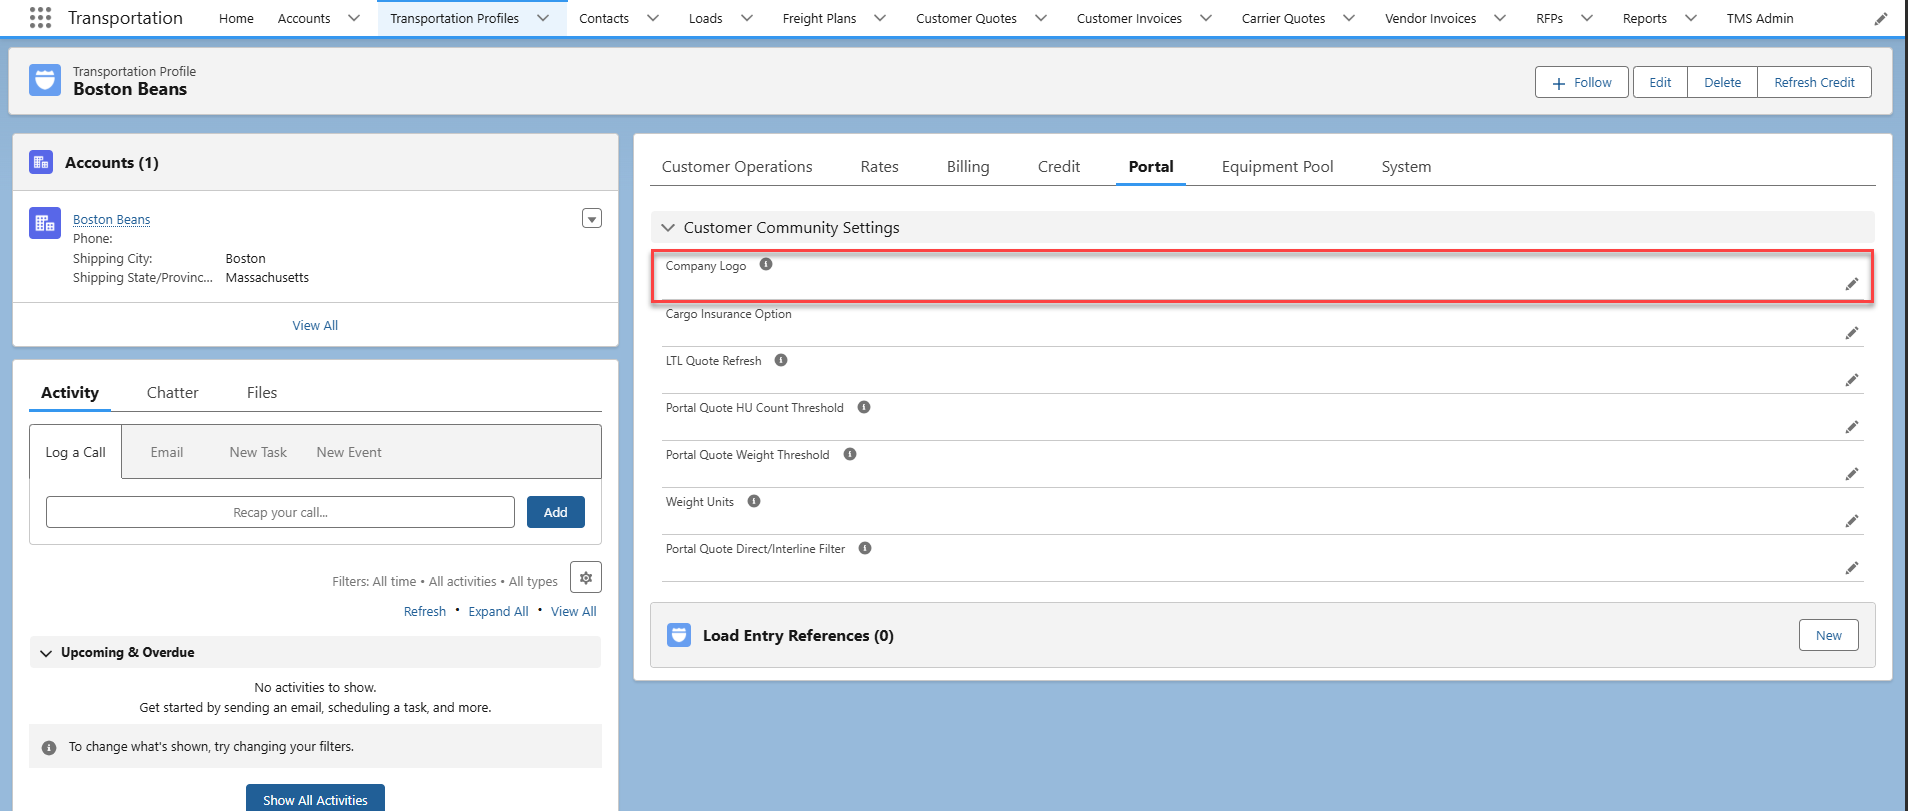
Add a company logo by navigating to Customer Transportation Profile → Portal → Customer Community Settings → Company Logo.
Ideal logo size should be 260 × 100 px.
Additionally, the Load Field Set Name may be created to display additional information/fields for the Customer Guest user. If left blank, the BOL Number, PRO Number, and Load Number fields are displayed by default.
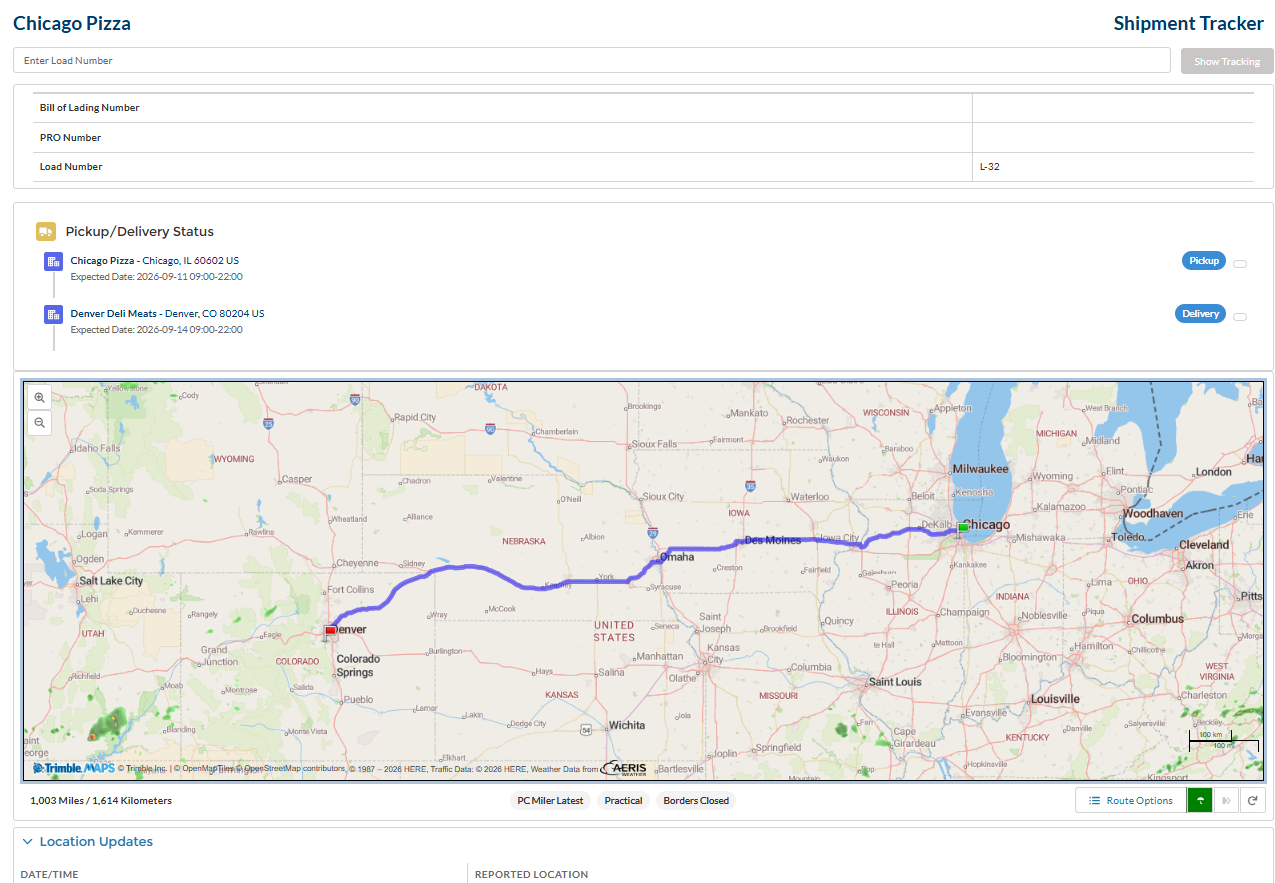
Preview the Customer Guest Tracking Page using the Customer Tracking Link in the Load Summary.
Create a Load within the TMS.
Once on the Load LRP, navigate from the Summary → Details tab.
In the Details tab, navigate to the Import/Export Information section.
Locate and click the Customer Tracking Link.