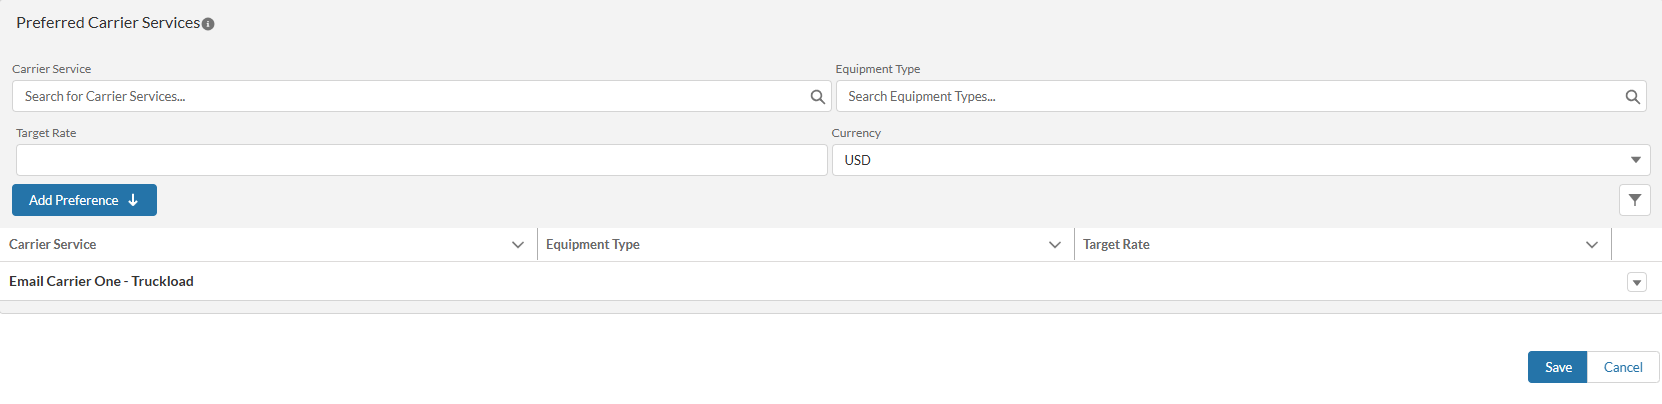
The Pending Loads Lightning Web Component (LWC) is located in the Customer Portal. View pending Loads and may be added to any page.
Default column fields in the Pending Loads LWC list view are:
Load Number
Mode
Expected Ship Date
Load details can be accessed by using the link under the Load Number column. Loads must meet the following conditions to appear on the LWC:
The customer matches the user’s contact Account Id field.
The Sales Status is pending.
The Load Status is Unassigned, Quotes Requested, or Quotes Received.
Use the  (refresh) button in the Pending Loads LWC to update the list view of pending Loads.
Lane Preferences
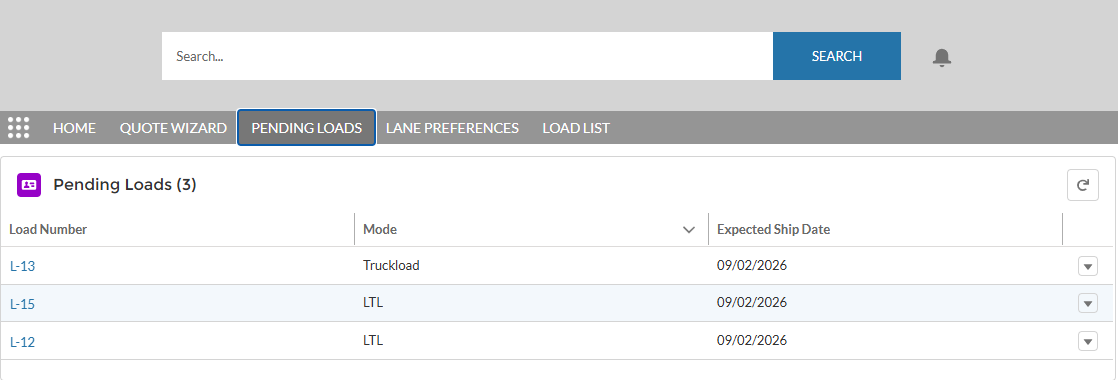
The Lane Preferences Manager LWC is also in the Customer Portal. Create and view commonly used Lanes and Carriers to transport Loads.
By default, the fields available in the Lane Preferences Manager LWC are:
Name
Lane
Effective Date
Expiration Date
Carrier Service Count
If multiple Lane Preference records exist, filter the list view using the  (funnel) icon. Click the drop-down arrow (caret) to view, edit, and delete Lane Preference records.
Create Lane Preferences
Create new lane preferences by clicking the New button on the right side of the LWC.
Once the New Lane Preference modal opens, the Transportation Profile defaults to the Customer Portal user, and the Effective Date is populated from the user’s time zone.
If the Lane Preference is only valid for a certain time period, enter a date in the Expiration Date field. Click the Refresh Exp link next to the Expiration Date field to clear it.
Use the Notes field to enter considerations for the Lane Preference.

Lane and New Lane Modal
In the Lane section of the New Lane Preferences modal, select location types to automatically populate the Origin and Destination Types. If new Lanes were previously created, use the Lane lookup field to select the Lane.
.png)
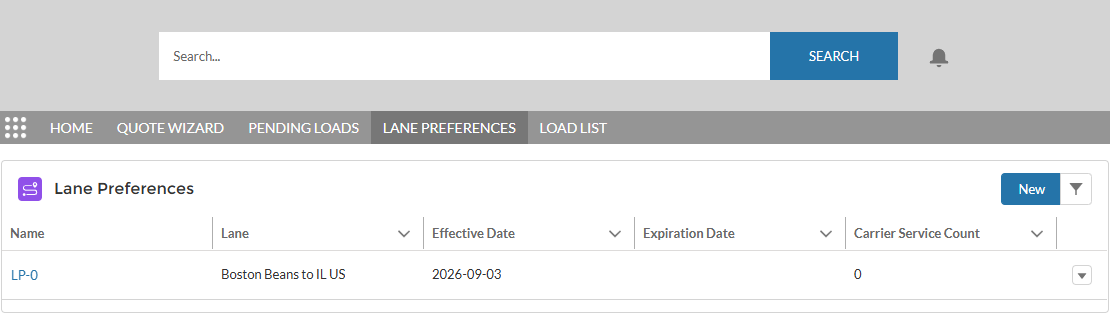
If a new Lane needs to be created, click the New Lane button.
Within the New Lane modal, select the Origin Type (for example, Country or City/State) and the Destination Type (for example, Location or Postal Code). Click the Save & Done button once complete.
Preferred Carrier Services
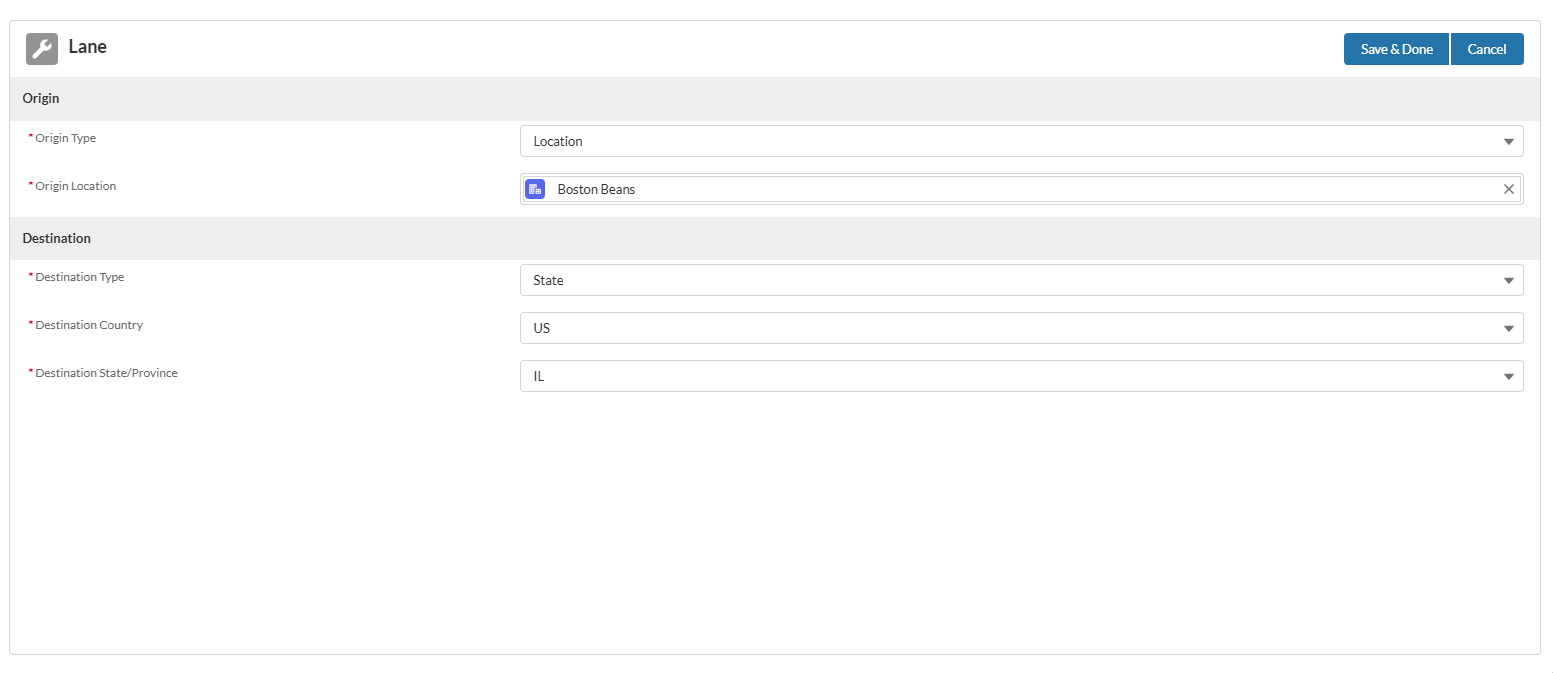
Search for and connect Carrier Services to a Lane Preference.
Add specific Equipment Types for the Preferred Carrier Service, so the Lane Preference related to a new Load auto-populates the Equipment Type.
Add the Preferred Carrier Service by clicking the Add Preference button.
For TMS orgs with multiple currencies enabled, select the corresponding currency type, such as USD or MXN, from the Currency field picklist. Keep in mind that the Currency field defaults to the org’s currency.
Enter a Target Rate amount for the Preferred Carrier Service.
Include additional Preferred Carrier Services to the Lane Preference as necessary. Delete Preferred Carrier Services by collapsing the drop-down arrow (caret) on the right side of the list view in the Preferred Carrier Services section.