Overview
The Blue Yonder integration allows Blue Yonder customers to create, rate, and tender loads in the TMS. Creation and tendering of loads are initiated by Blue Yonder and handled by a Connected App and REST based classes within the TMS. Returning of rates to Blue Yonder is handled by an outbound API call from the TMS to Blue Yonder.
Setup Connected App Access
Step 1: Create the Blue Yonder user
Create a new user with the following values.
First Name: Blue
Last Name: Yonder
Email: Set to the system admin's email
Username: Change if necessary
User License: Salesforce
Profile: Standard User
Add the Permission Set, TMS Blue Yonder API, to the user.
Step 2: Allow Authorization Code and Credentials Flows
From Setup → search and select OAuth and OpenID Connect Settings.
Enable Allow Authorization Code and Credentials Flows.

Step 3: Create New Connected App
Create a Connected app by following the steps below. Skip these steps if the Blue Yonder App already exists.
Create the Connected App.
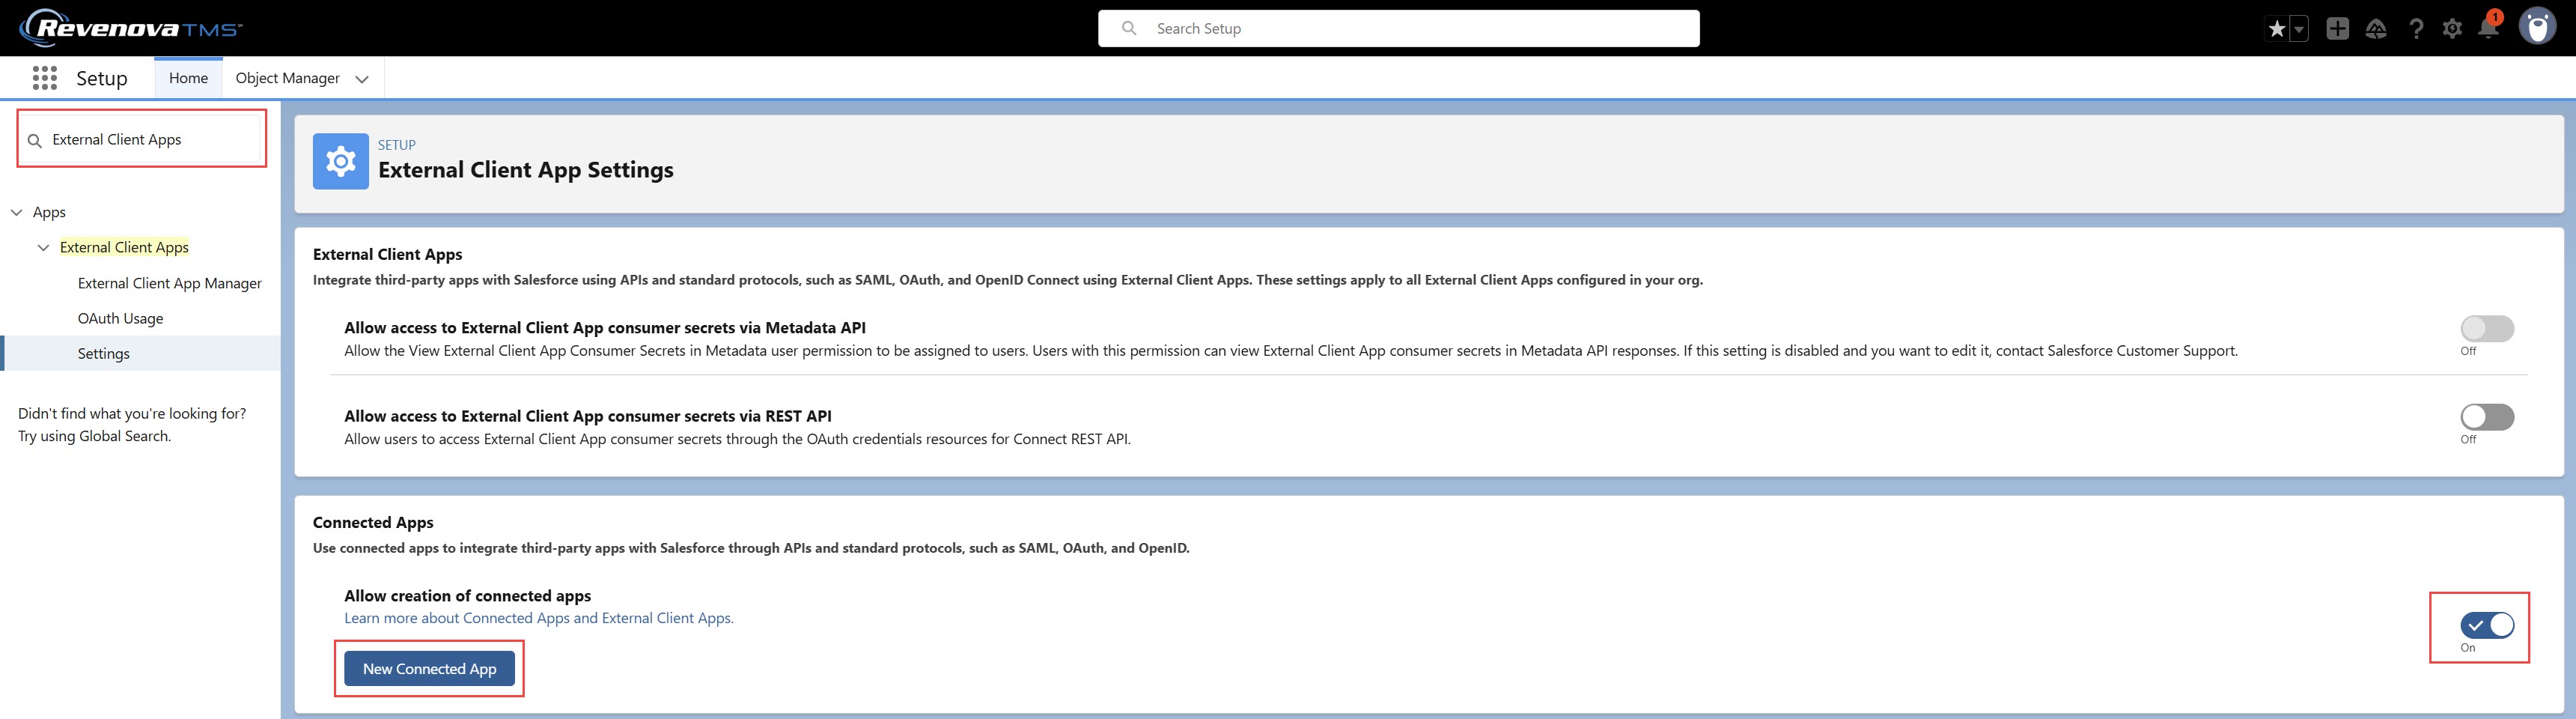
Navigate to Setup and search for External Client Apps and select the Settings link.
From the Connected Apps section, choose On for Allow creation of connected apps.
Click the Enable button on the modal to create Connected Apps.
Click the New Connected App button.
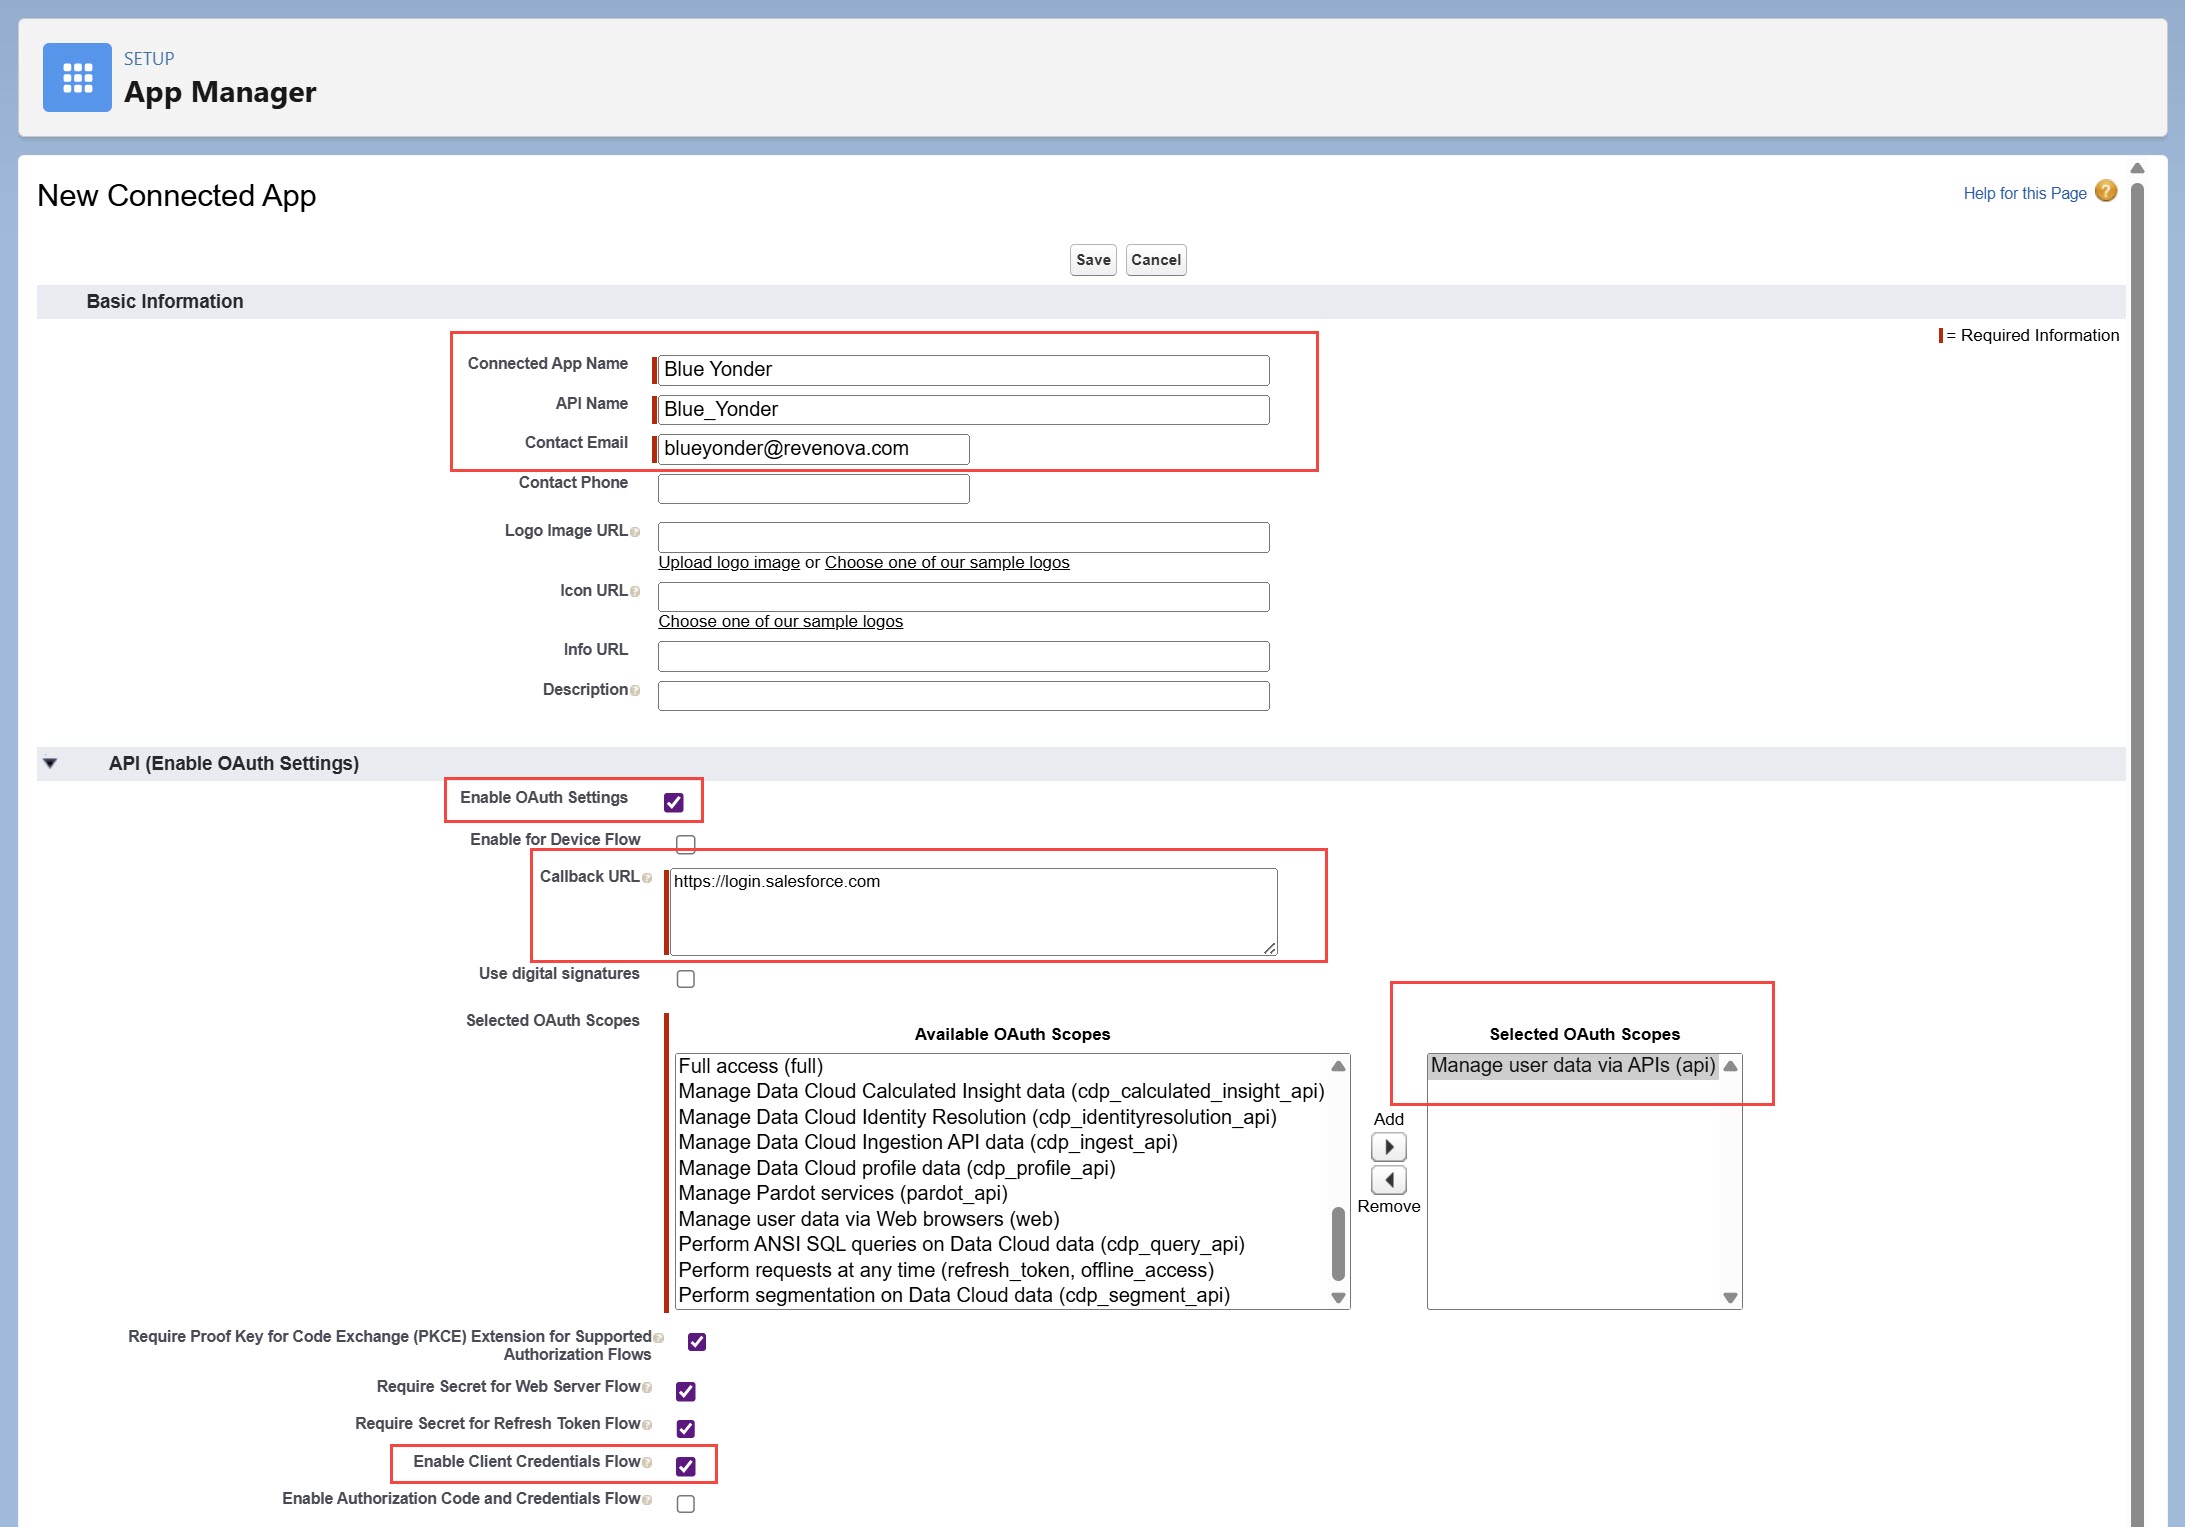
Enter the following information.
Connected App Name: Blue Yonder.
Contact Email: System Admin's email.
Enabled OAuth Setting: Checked (true).
Callback URL: https://login.salesforce.com/.
Selected OAuth Scopes: Add Manage user data via APIs (api).
Enable Client Credentials Flow: Checked.
Click Save.
Step 4: Add Trusted IP Range for OAuth Web Server Flow
If you navigated away from the newly created App, go to Setup → Manage Connected Apps.
Click View on the Blue Yonder app.
Go to the Trusted IP Range for OAuth Web Server Flow section, click New.
Add the following IP ranges ( repeat step 3 for each IP range):
Start IP Address, End IP Address: 20.122.40.48.
Start IP Address, End IP Address: 52.177.14.131.
Start IP Address, End IP Address: 52.247.78.106.

Step 5: Access the Consumer Key and Consumer Secret
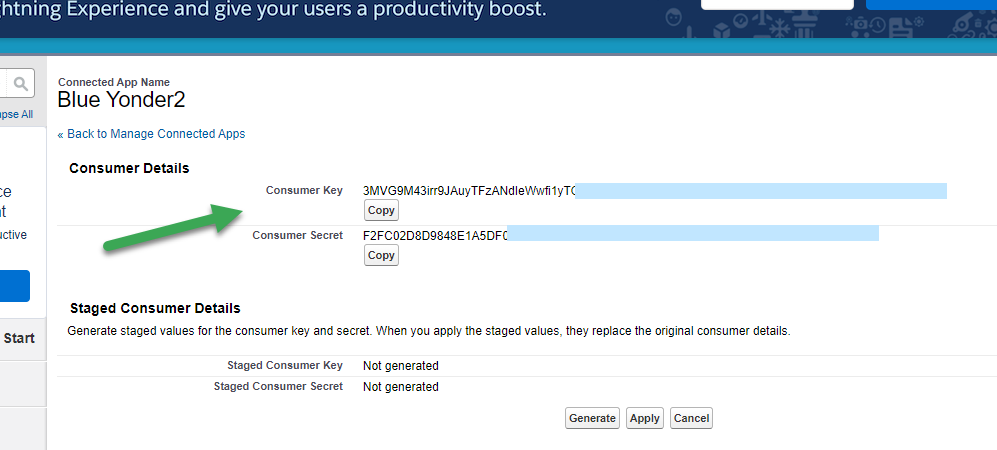
From the Blue Yonder connected app, click the Manage Consumer Details button.
Salesforce will send a verification email to the system admin's email address, enter this code in the Verify Your Identity page.
Copy the Consumer Key and Consumer Secret to provide to Blue Yonder.
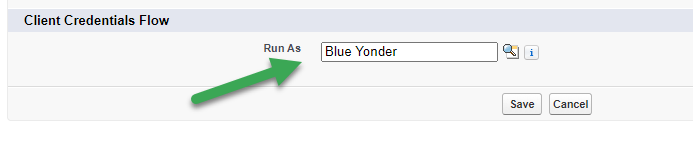
Step 6: Set Client Credentials Flow Run As user
From the Blue Yonder connected app, click the Manage button at the top of the page.
Click the Edit Policies button.
In the Client Credentials Flow section, set the Run As user to the Blue Yonder user you created in Step 1 .
The following endpoints will need to be provided to Blue Yonder. Note that “{domain}” can be found under Setup → My Domain Settings → Current My Domain URL.
OAuth authorization endpoint: https://{domain}/services/oauth2/token
Quote request endpoint: https://{domain}/services/apexrest/rtms/blueyonderloadservice
Tender request endpoint: https://{domain}/services/apexrest/rtms/blueyondertenderservice